
7 Most Popular Portrait Lighting Setups
Portrait Lighting Setups that Every Photographer Must Know!
Portrait photography is a dynamic art form, and the key to creating stunning portraits lies in mastering various lighting setups. In this comprehensive guide, we will explore seven different portrait lighting setups. Whether you're a seasoned photographer or a beginner looking to enhance your portrait skills, this guide will empower you with the knowledge and techniques needed to achieve captivating results.
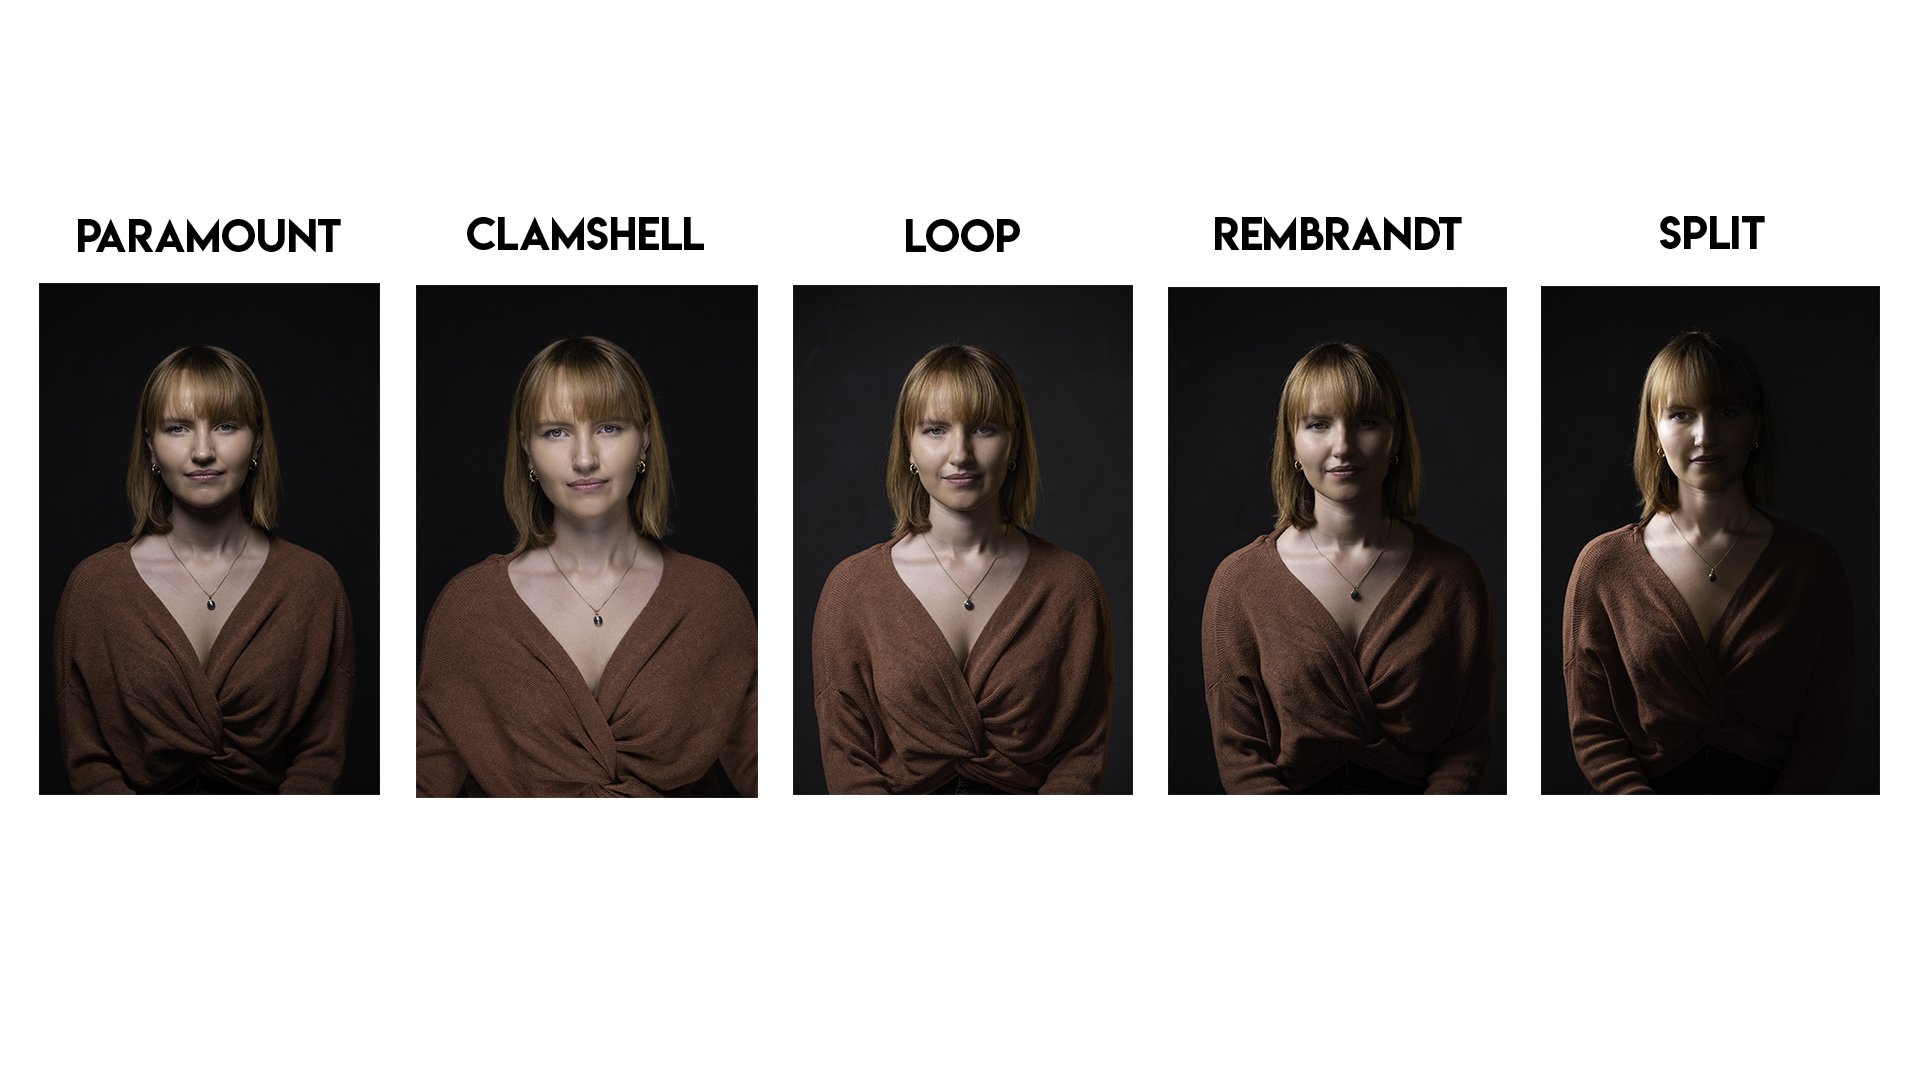
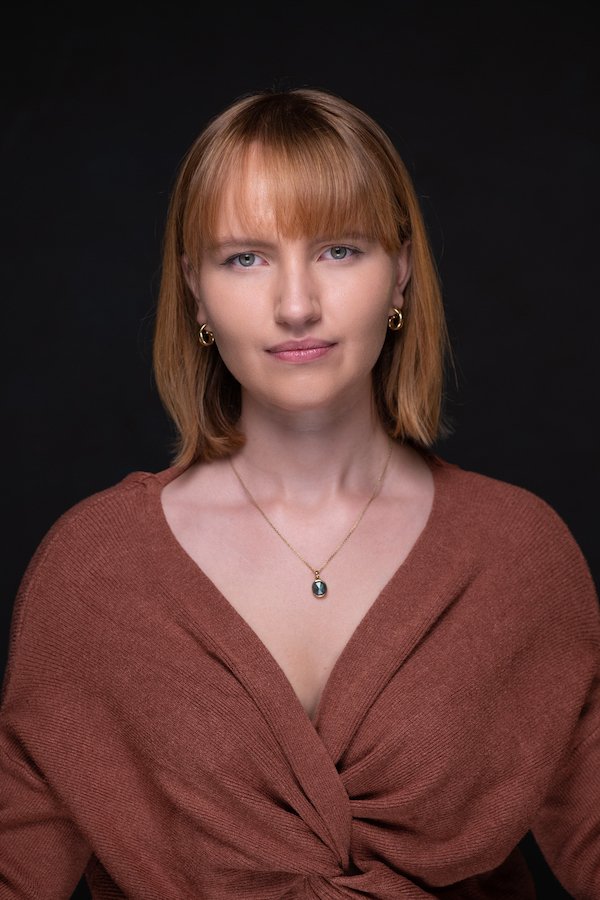
Setup 1: Paramount (Butterfly) Lighting
Paramount lighting, often referred to as Butterfly lighting, is a classic portrait lighting setup that creates a distinctive and elegant look. In this technique, the key light is positioned directly in front of the subject and slightly above their eye level, angled downward at about 45 degrees. This placement creates a subtle shadow under the nose and a more pronounced shadow under the chin, resembling the shape of a butterfly. Paramount lighting is known for its ability to emphasize the jawline and cheekbones, making it a popular choice for beauty and portrait photography. It creates a flattering, softly lit look that enhances the subject's facial features while maintaining a sense of grace and simplicity.

Paramount or Butterfly Portrait Lighting by Yuliya Panchenko
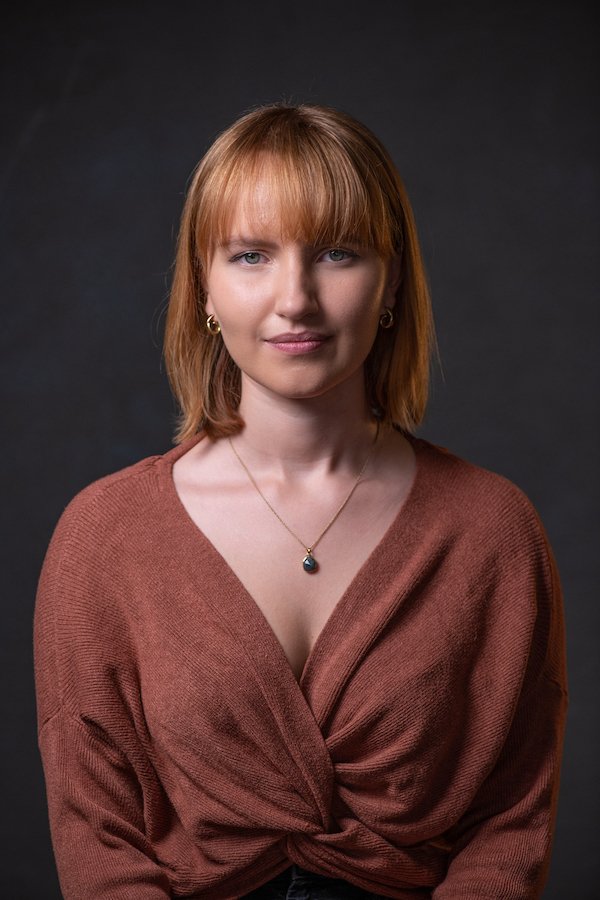
Setup 2: Clamshell Lighting
Clamshell lighting is a popular and versatile portrait lighting setup in photography. This technique involves positioning two light sources, typically a key light above the subject and a reflector below the subject's face. The key light illuminates the subject's features from above, while the reflector bounces light back from below, reducing shadows and softening facial contours. The result is a flattering and evenly lit portrait with minimal harsh shadows. Clamshell lighting is commonly used in beauty and portrait photography to enhance the subject's facial features, particularly cheekbones and jawlines, while maintaining a natural and pleasing look. It is a go-to setup for achieving soft, even illumination and creating a polished, glamorous appearance.
Clamshell Portrait Lighting by Yuliya Panchenko
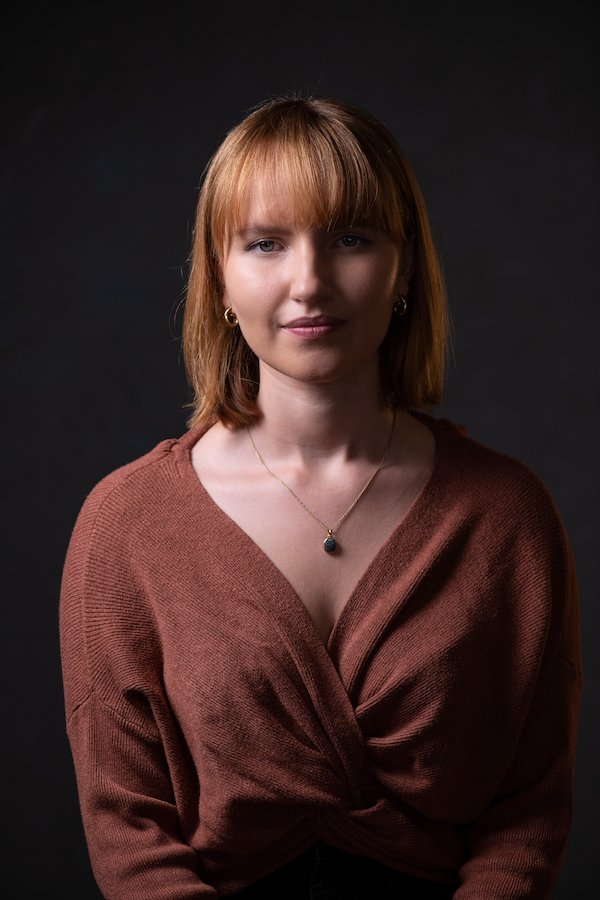
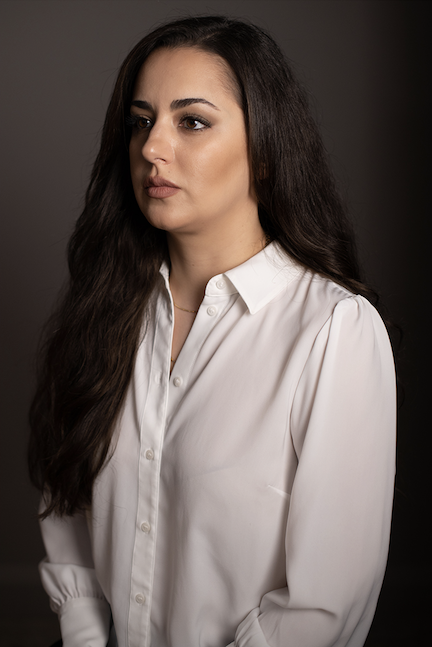
Setup 3: Loop Lighting
Loop lighting is a classic portrait lighting technique characterized by the formation of a loop-shaped shadow on one side of the subject's face. It is achieved by positioning the key light at a 45-degree angle to the subject, slightly above eye level. This setup creates a gentle, flattering shadow that starts at the subject's nose and extends towards the cheek. Loop lighting is known for its ability to define facial features and add dimension while maintaining a soft, approachable look. It is a popular choice for various portrait styles, adding depth and character to the subject's face while retaining a pleasing, natural appearance.
Loop Portrait Lighting by Yuliya Panchenko
Setup 4: Rembrandt Lighting
Rembrandt lighting is a classic and dramatic portrait lighting technique used in photography. Named after the renowned Dutch painter Rembrandt, this lighting style involves positioning the key light at a 45-degree angle to the subject's face, creating a distinct triangle of light on the cheek opposite the light source. The key characteristic of Rembrandt lighting is the presence of this triangle of light, which adds depth and dimension to the portrait. While it provides a touch of shadow and mystery, it also maintains an overall flattering and cinematic quality, making it a popular choice for portrait photographers seeking a dramatic and emotive look.
Rembrandt Portrait Lighting by Yuliya Panchenko
Setup 5: Split Lighting
Split lighting in photography is a striking and dramatic lighting technique that involves illuminating only one half of the subject's face while leaving the other half in shadow. This setup creates a clear division between light and shadow, resulting in a visually compelling and moody effect. The illuminated side of the face stands out prominently, while the shadowed side adds depth and intrigue to the portrait. Split lighting is often used to convey a sense of mystery, intensity, or even duality in the subject, making it a powerful choice for portraits when you want to evoke strong emotions or emphasize certain facial features.

Split Portrait Lighting by Yuliya Panchenko
Setup 6: Short Lighting
Short lighting is a portrait lighting technique that involves positioning the main light source at an angle where it illuminates the side of the subject's face that is turned away from the camera. In short lighting, the side of the face facing the camera is in shadow, while the side turned away receives the majority of the light. This creates a striking and dramatic effect by emphasizing the shadows and contours of the subject's face. Short lighting is often used to slim and define the face, making it a popular choice for portrait photography when you want to add depth and sculpt the subject's features.

Short Lighting Portrait Lighting by Yuliya Panchenko
Setup 7: Broad Lighting
Broad lighting in photography is a lighting technique where the key light illuminates the broad side of the subject's face, creating a distinctive look. In this setup, the side of the face that is turned slightly toward the camera receives the most light, while the other side is in shadow. This technique is often used to emphasize the highlights and features of the subject's face, making it appear wider and more prominent. Broad lighting can be particularly effective for adding drama and impact to portraits, especially when you want to showcase facial details or create a visually striking image with a strong interplay of light and shadow.
Broad Lighting Portrait Lighting by Yuliya Panchenko
Fill and Negative Fill
In photography, fill and negative fill are essential techniques for controlling the intensity of shadows in an image. Fill light involves adding additional light to the scene, typically from a reflector or secondary light source, to reduce the harshness of shadows and provide more even illumination. It helps soften shadows and create a balanced and flattering lighting effect, particularly in portrait photography. On the other hand, negative fill is about subtracting light, often by using flags, black surfaces, or blocking devices, to increase shadow contrast and intensity. Negative fill can add drama and depth to an image by accentuating shadows, making it a valuable tool in creating visually striking compositions. Photographers use these techniques to fine-tune the play of light and shadow in their photographs, achieving their desired artistic effect.
Mastering various portrait lighting setups is the key to creating captivating and emotionally resonant portraits. Understanding the nuances of each setup will empower you to create portraits that convey your intended mood and message. Elevate your portrait photography skills and embark on a journey of creative expression through the art of lighting.