
The Missing Link Between Lighting and Posing in Boudoir Photography
Why posing and lighting must work together
Boudoir photography is often described as a balance between art and technique, but many photographers struggle to understand why their images sometimes feel flat or unflattering even when the pose looks beautiful in person. The problem is rarely the camera settings, the lens, or even the model. More often than not, the issue lies in the relationship between lighting and posing.
The Most Important Concept Photographers Miss
One of the most common problems I see in boudoir photography is that photographers treat lighting and posing as two completely separate skills. They learn posing techniques in one place and lighting techniques somewhere else, assuming that each element can be mastered independently. In reality, boudoir photography does not work this way. Lighting and posing are inseparable, and understanding how they interact is the difference between a photograph that looks flat and one that beautifully sculpts the body.
This concept became the foundation of my Light the Pose course and the demonstration I presented at the Boudoir Summit during WPPI 2026. The entire idea revolves around one simple principle: when the pose changes, the light must change; and when the light changes, the pose must adjust. A pose may look elegant and flattering in person, but if the light hits that pose incorrectly, the curves disappear and the body loses its dimensionality. Likewise, even the most beautiful lighting setup will fail if the subject’s body is positioned in a way that prevents the light from revealing those curves.
Many photographers approach lighting primarily from a technical perspective, focusing on exposure and brightness. While proper exposure is necessary for a technically correct image, it is not the true goal in boudoir photography. The real objective is to expose the curves of the body. Boudoir photography is fundamentally about sculpting the human form with light and shadow, allowing highlights and shadows to reveal the elegance and shape of the body. When light is positioned correctly, it enhances the natural contours of the waist, hips, shoulders, and legs. When light is placed incorrectly, it spreads evenly across the subject and flattens those same curves.
The Goal Is Not Exposure — It Is Curves
In many genres of photography, the priority is simply to expose the subject properly. In boudoir photography, however, the artistic goal goes much deeper than technical exposure. The focus is on creating dimensionality by allowing the light to travel across the body in a way that emphasizes its shape. The highlights should gently outline the body while shadows create depth and separation. This contrast between light and shadow is what gives boudoir photography its sensual and artistic quality.
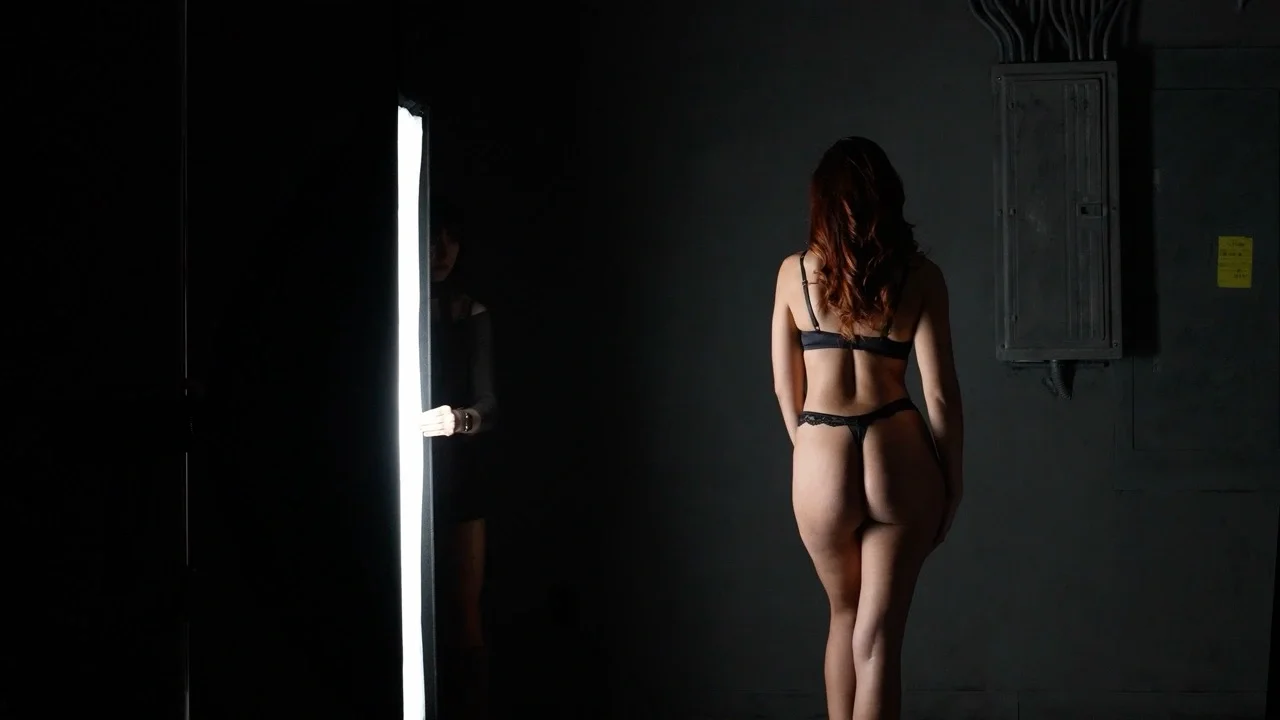
When photographers place their lights directly in front of the subject or too close to the camera’s direction, the shadows that define the body begin to disappear. The light fills in the areas that should remain shaded, and the curves that give the body its shape suddenly become less visible. Instead of seeing a sculpted form, the viewer sees a surface that appears wider, flatter, and less dynamic. This is one of the biggest mistakes in boudoir photography and one of the main reasons many images fail to capture the elegance that the pose originally had.
Because of this challenge, I developed a simple guideline to help photographers quickly understand where light should be placed relative to the body. This guideline is what I call the 45-degree safe zone, and it helps photographers avoid the lighting positions that flatten the subject.
The 45-Degree Safe Zone
The safest range for lighting in boudoir photography lies between roughly forty-five degrees behind the subject and forty-five degrees in front of the subject. Within this zone, the light naturally interacts with the body in a way that enhances curves instead of eliminating them. Understanding how the light behaves within this range allows photographers to quickly adjust their setup and maintain the sculptural quality that boudoir photography requires.
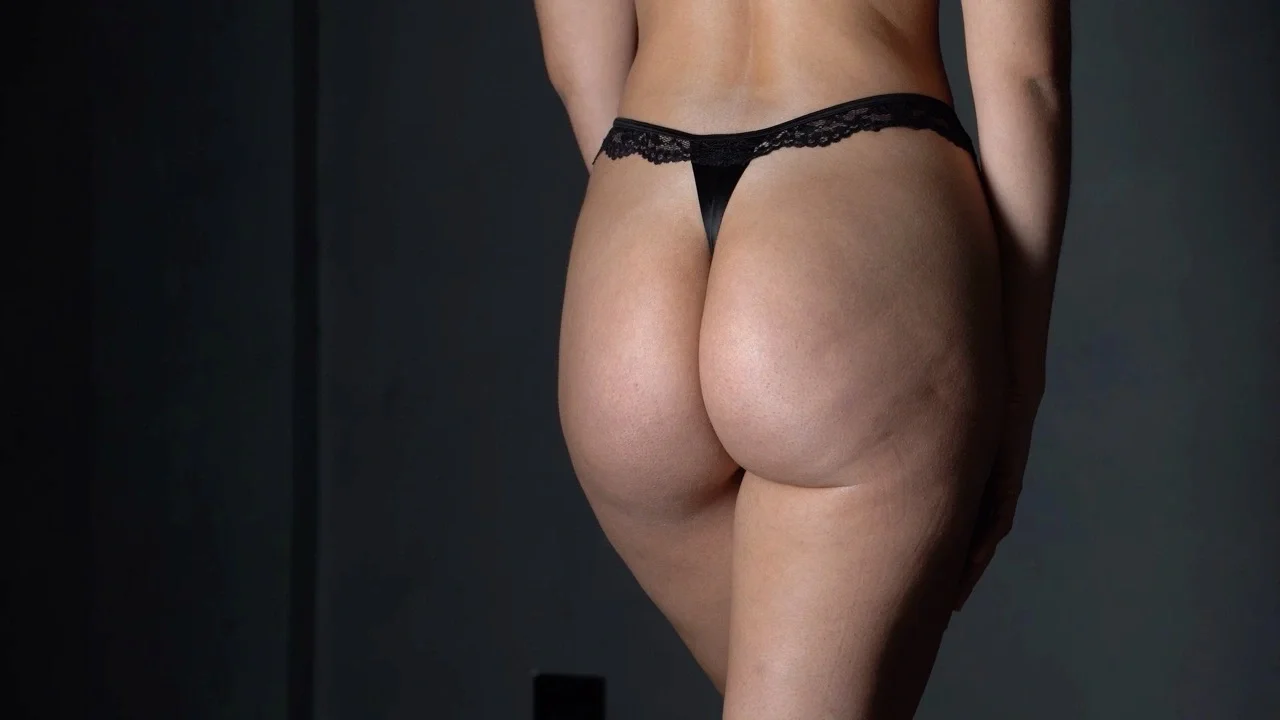
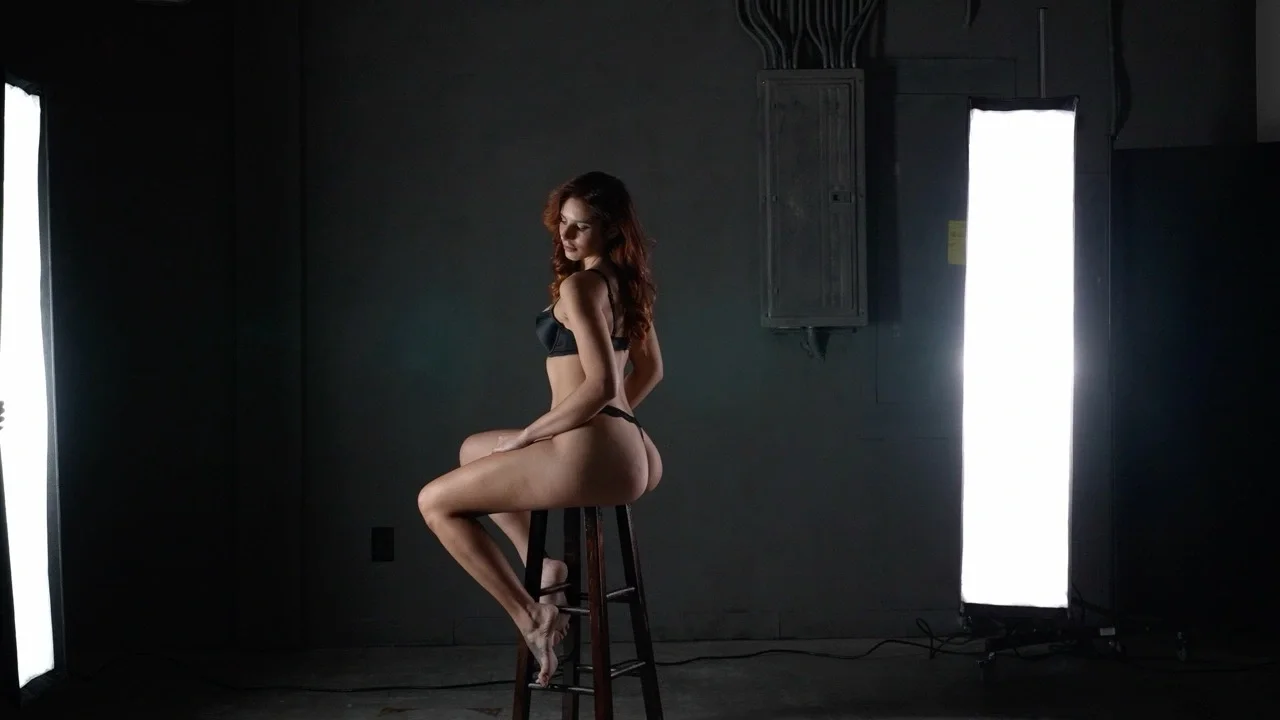
When the light is positioned about forty-five degrees behind the subject, it begins to skim across the contours of the body rather than striking the front directly. This creates a dramatic effect where the highlights trace the outer edges of the body while shadows dominate the areas facing the camera. The result is a low-key lighting style that emphasizes shape and form. The waistline becomes more defined, the hips gain depth, and the body appears sculpted rather than illuminated evenly.
As the light moves further toward the side of the subject, reaching approximately ninety degrees relative to the camera, the lighting transitions into side lighting or split lighting. At this angle, one side of the body is illuminated while the other falls into shadow. This balance between highlight and shadow is extremely powerful because it exaggerates the separation between the curves of the body. Side lighting is often used in fine art boudoir and nude photography because it produces a dramatic sculptural effect that emphasizes the body’s natural form.
When the light continues to move toward the front and reaches roughly forty-five degrees in front of the subject, the lighting becomes brighter and softer. Although this position is not technically true high-key lighting, it begins to move in that direction. The shadows become less dramatic and the overall image feels lighter and more open. This type of lighting is commonly used in bridal boudoir or lifestyle boudoir photography, where the goal is to create an airy and romantic atmosphere while still maintaining enough shadow to preserve the shape of the body.

The Zone That Flattens the Body
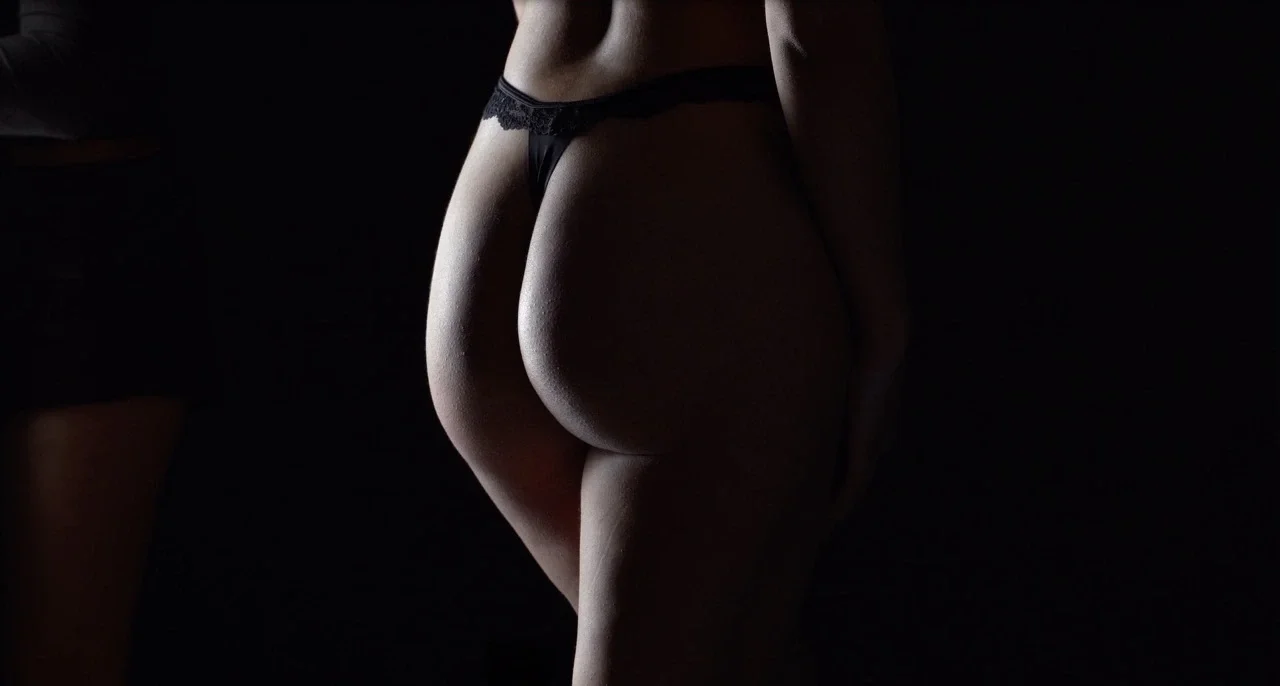
The real problem begins when the light moves past that forty-five-degree point toward the front of the subject. Once the light becomes too frontal, the shadows that previously defined the curves begin to vanish. The light fills in every contour, spreading evenly across the body and eliminating the depth that made the pose flattering.
This is what I refer to as the Flat Zone for boudoir lighting. In this position, the body begins to appear flatter and wider because the shadows that create dimension are no longer present. Many photographers experience this issue when they place their light near the camera or use lighting setups that mimic on-camera flash. The result may still be properly exposed, but the artistic quality of the image suffers because the body loses its sculptural appearance.
What makes this mistake particularly frustrating for photographers is that the pose itself may be perfectly executed. The subject’s posture, body angles, and expression might all be ideal, yet the final image still feels unflattering. In most cases, the problem is not the pose at all. The problem is simply the direction of the light.
What Kills the Curves
Since boudoir photography is built around emphasizing the natural curves of the body, it is important to understand what destroys those curves in a photograph. Two common mistakes can quickly eliminate the sculptural quality of a pose: frontal lighting and showing only one curve to the camera.
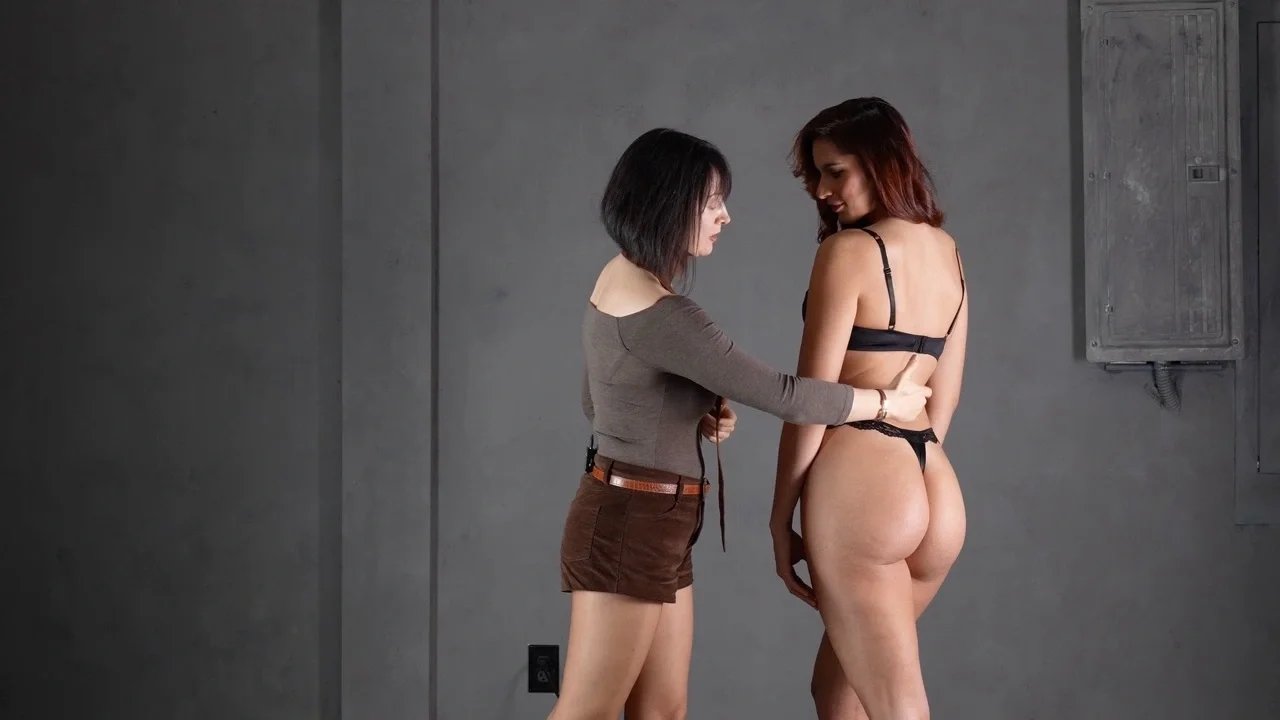
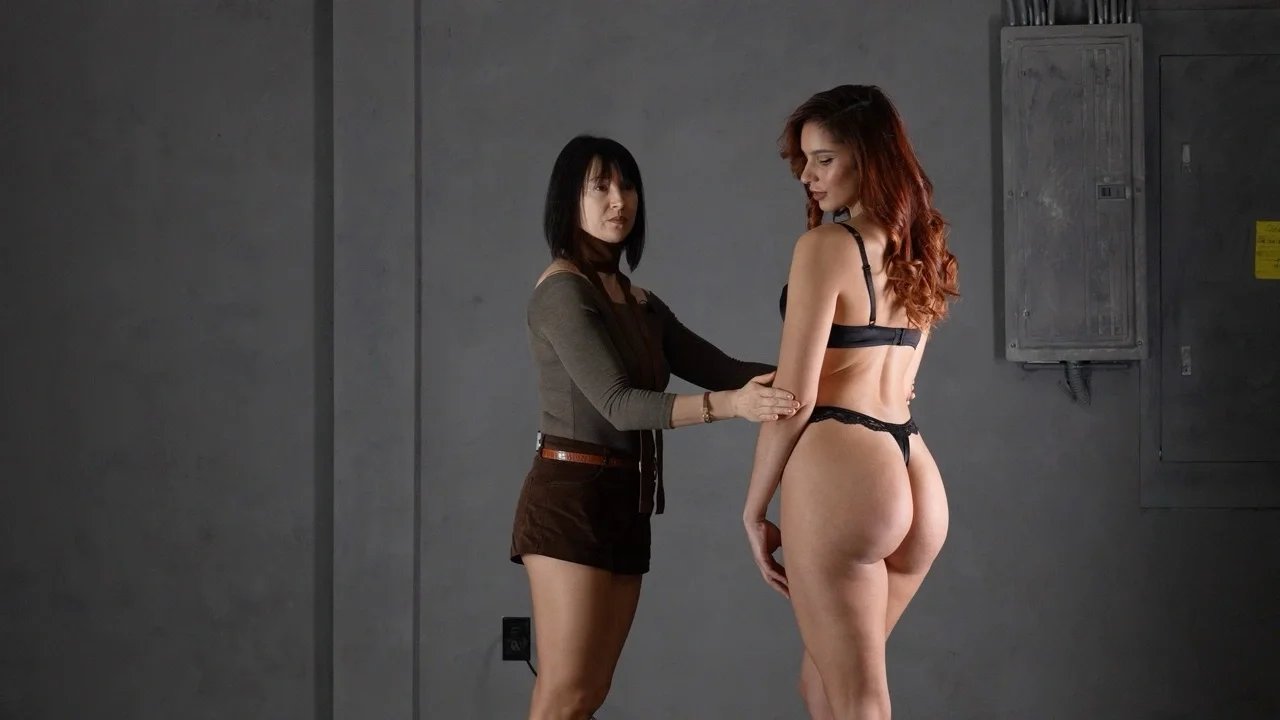
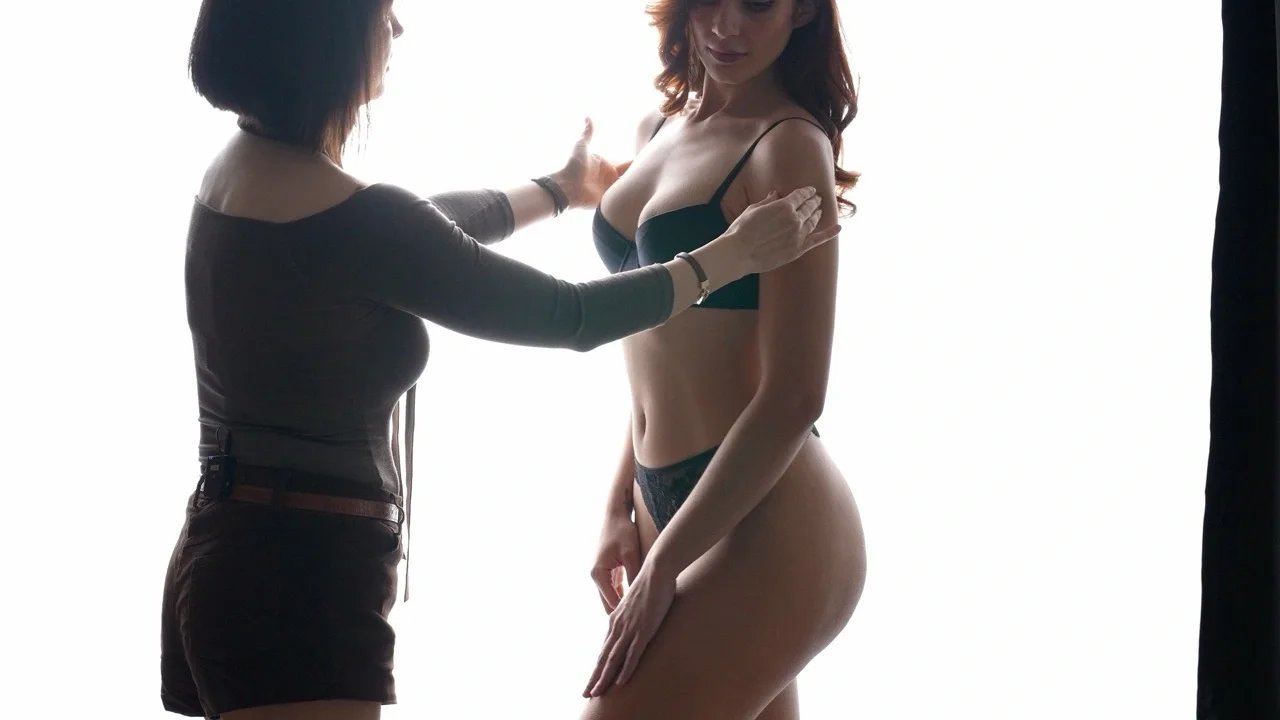
Frontal lighting is one of the biggest offenders because it fills in the shadows that define the body’s shape. When the light is positioned directly in front of the subject or too close to the camera’s direction, it spreads evenly across the body and eliminates the highlight-to-shadow transition that reveals depth. Even a beautifully posed subject can appear wider and flatter under frontal lighting because the light removes the visual separation between the body’s contours. This is why controlling the angle of the light is so important when applying the Light the Pose method.
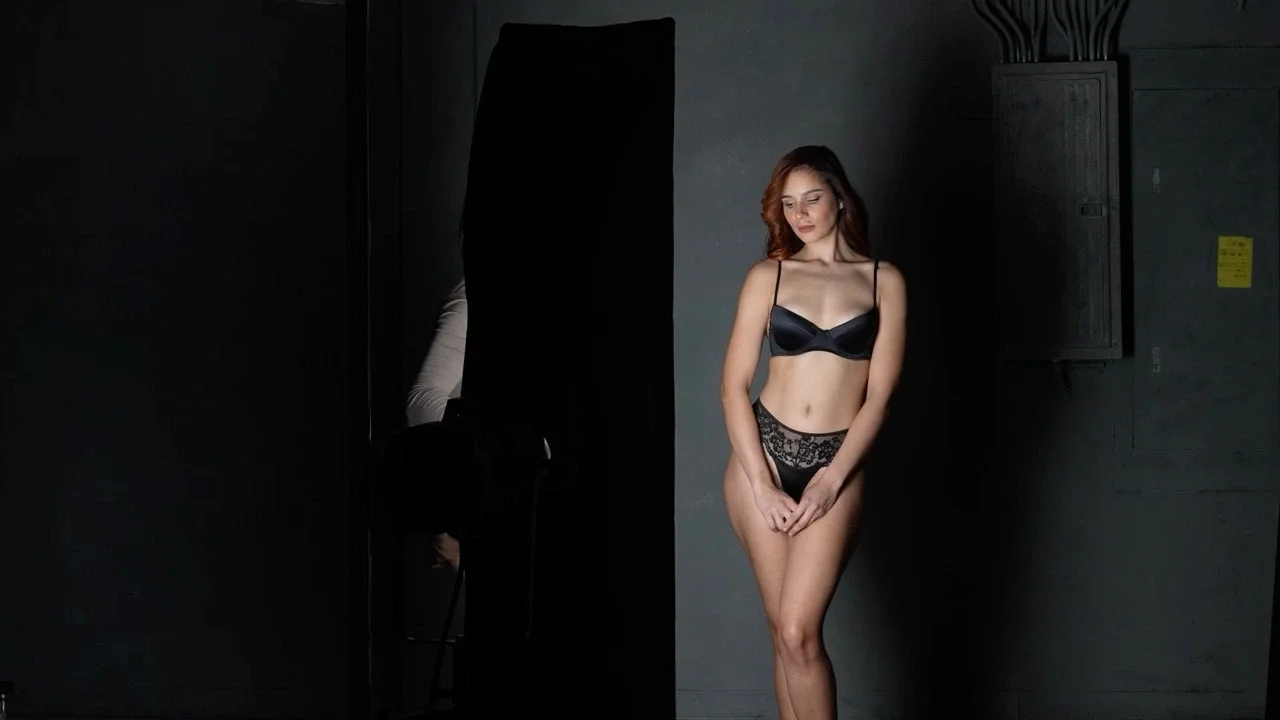
The second issue is related to posing rather than lighting. In boudoir photography, the most prominent curves of the body are typically the breasts and the booty. These curves create the dynamic silhouette that gives boudoir photography its sensual and elegant appearance. When posing the subject, it is usually desirable for both of these curves to be visible to the camera at the same time. This is often achieved through a slight tilt of the body toward the camera so that the chest and the hips remain within the frame’s visual line.
If only one of these curves is visible while the other disappears behind the body, the pose can lose much of its dimensional quality. The image may begin to feel flat or less dynamic because the visual rhythm created by multiple curves is no longer present. Of course, there are situations where showing only one curve may be intentional for artistic reasons, but in most boudoir poses revealing both curves helps maintain a stronger and more balanced composition.
When photographers learn to control both the direction of the light and the presentation of the body’s curves, their images instantly gain more depth, elegance, and visual impact.
When the Light Cannot Move
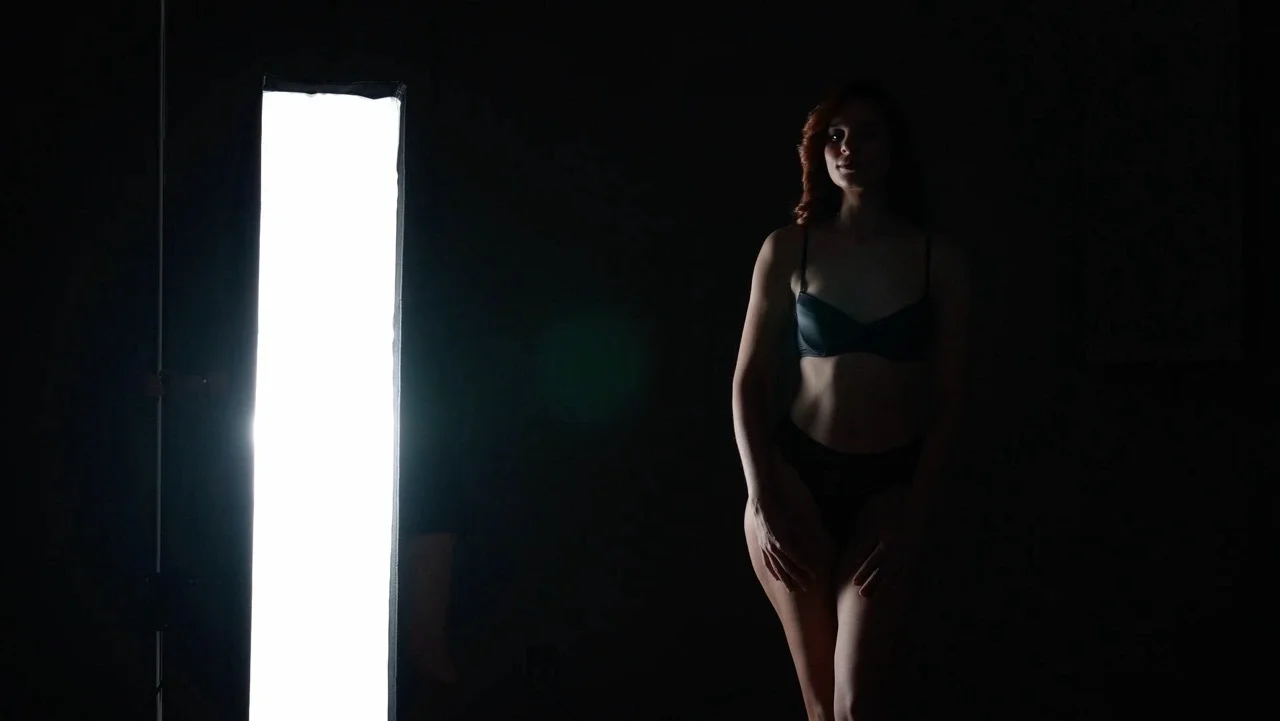
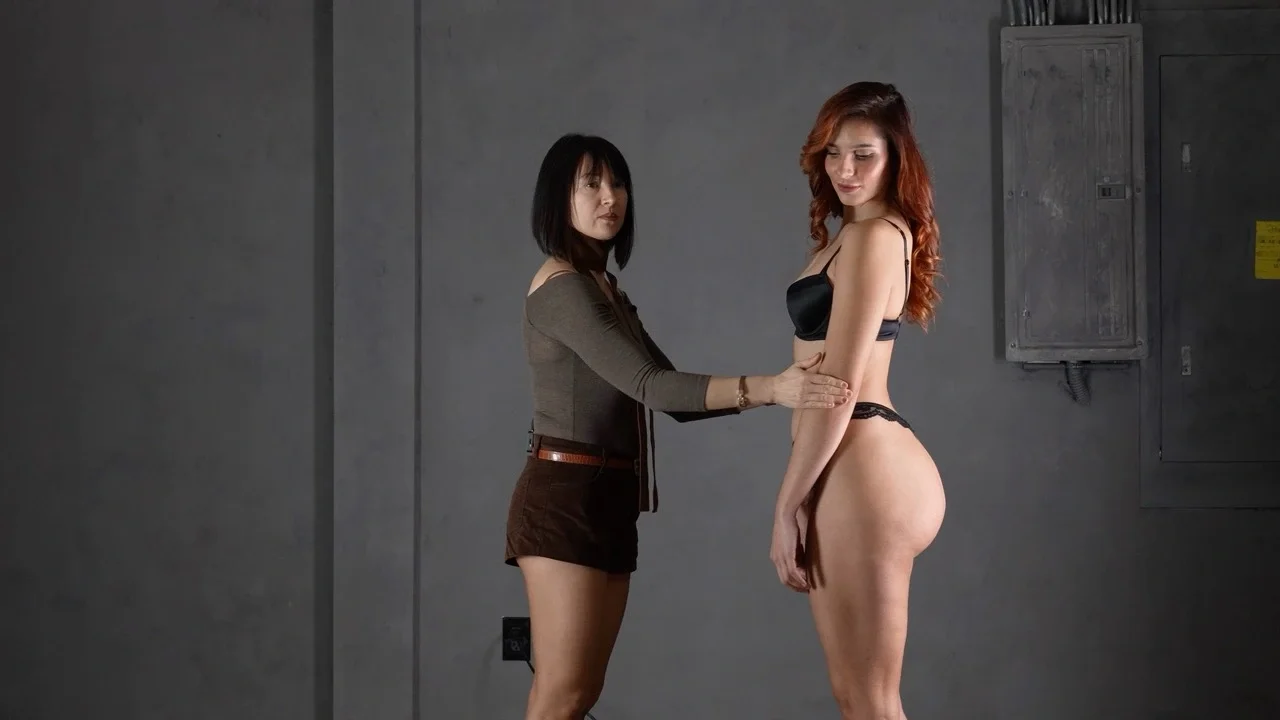
In studio environments, photographers have the freedom to reposition their lights as needed. However, there are many situations where the light source cannot be adjusted. Natural window light is the most common example. When working with window light, the position of the light source is fixed, which means the photographer must adapt the pose rather than moving the light.
This is where the Light the Pose technique becomes especially important. Instead of attempting to reposition the light, the photographer simply rotates the subject’s body so that it faces the light at roughly a forty-five-degree angle. By turning the body slightly toward the window, the light begins to travel across the curves rather than hitting the front of the body directly.
This small adjustment allows the highlights to fall naturally along the curves of the body while shadows remain present on the opposite side. The result is a photograph that retains dimensionality and shape even though the light source itself has not moved. This technique works equally well with natural window light, artificial window simulations, or any other fixed lighting environment.
Demonstrating the Concept
Inside the Light the Pose course, I demonstrate this concept through several practical setups so photographers can see exactly how the relationship between light and pose works in real time. The demonstrations begin with a simple one-light setup that shows how moving the light slightly around the subject dramatically changes the way the curves appear in the photograph. From there, the course expands into a two-light setup that illustrates how additional light sources can either enhance the shape of the body or accidentally flatten it if they are placed incorrectly.
Finally, the course includes a simulated window lighting demonstration where the light source remains fixed. In this situation, the model’s body is rotated and adjusted relative to the light so photographers can clearly see how posing becomes the primary tool for controlling the way light interacts with the curves of the body.
This approach reflects the broader teaching philosophy behind the educational platform created by Yuliya Panchenko, which focuses on helping photographers understand the artistic relationship between lighting and posing rather than memorizing isolated techniques.

The Equipment Behind Lighting the Pose
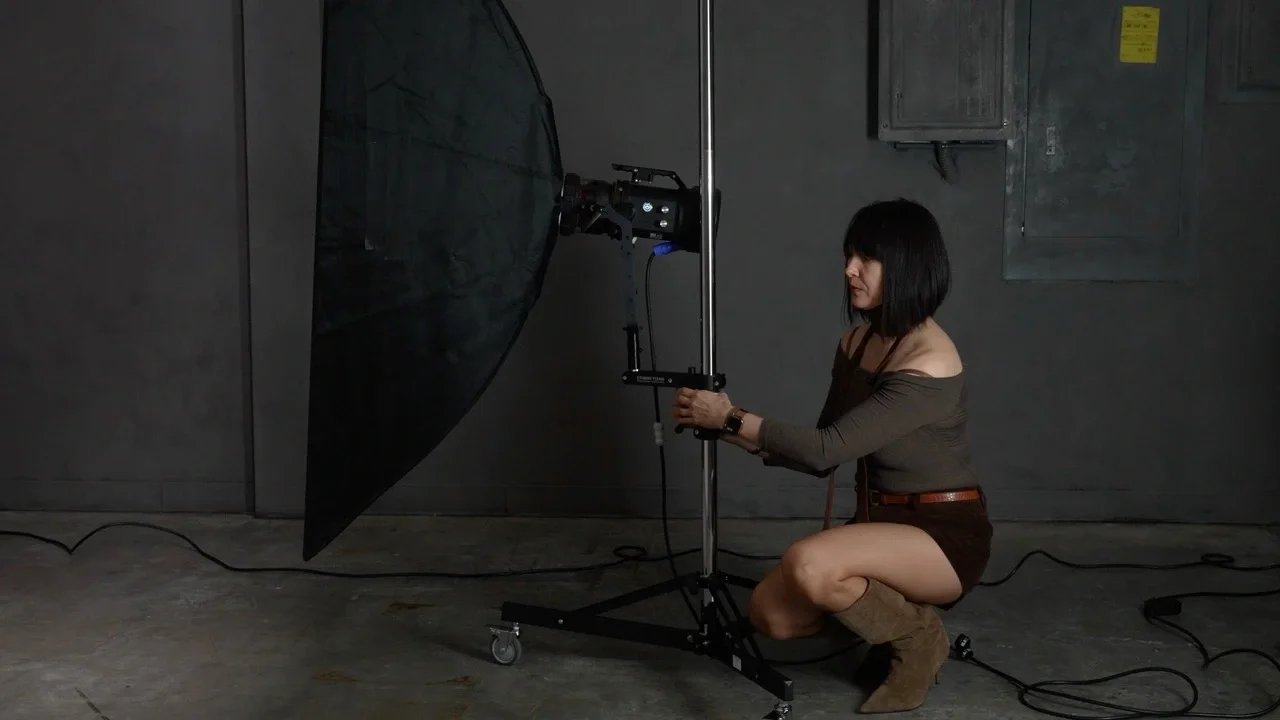
To successfully apply the Light the Pose method, photographers must be able to see how light interacts with the body in real time. While strobes can produce beautiful results, they often require constant test shots and adjustments. This back-and-forth slows down the session and can be frustrating for the subject, especially when they are holding a pose that requires effort and balance.
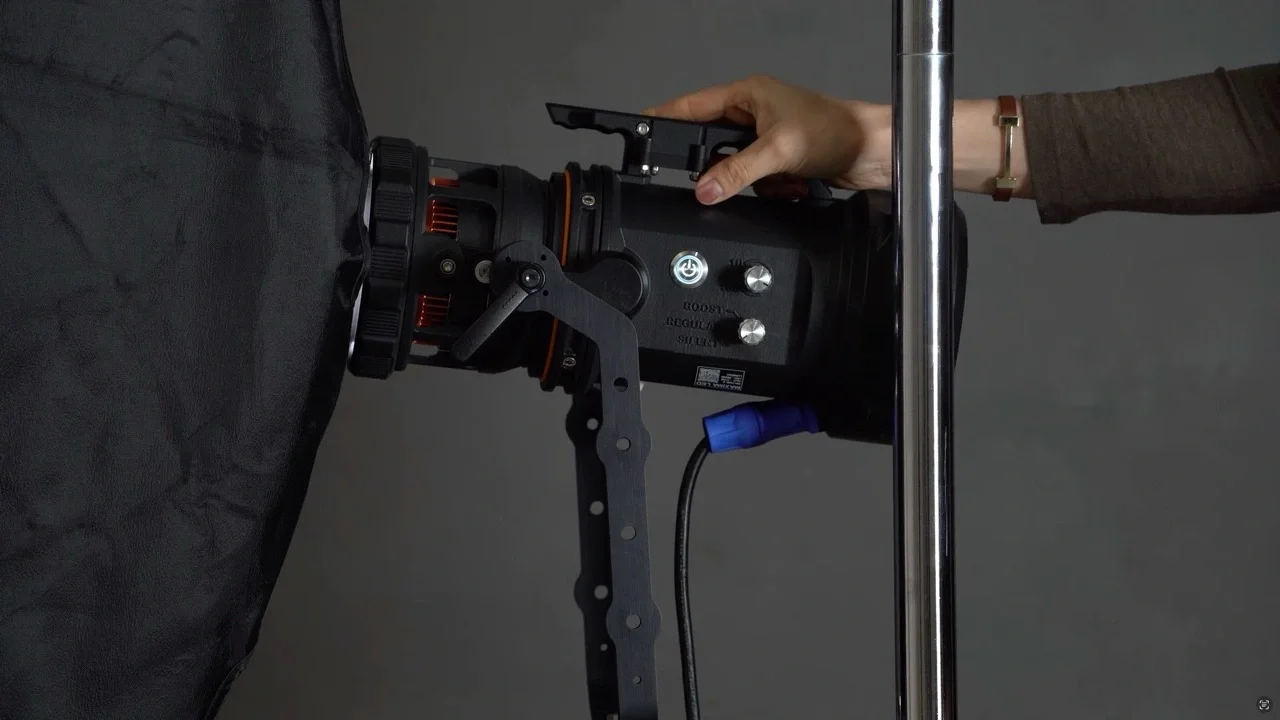
For efficiency and speed, I prefer using high-quality continuous LED lighting, which allows me to see highlights and shadows instantly while directing the pose. In my studio, I use Maxima LED lights, an Italian premium continuous lighting system known for its durability, accurate color rendering, and powerful output. Lights over 200 watts provide enough power to clearly shape the body and reveal the curves without needing repeated test shots.
To control the direction of the light across the entire body, I pair these lights with stripboxes over five feet tall, which create a long vertical light source that naturally follows the form of the body. For fast adjustments during a session, I mount the lights on Studio Titan rolling light stands with a pistol grip, allowing me to quickly raise, lower, and reposition the light. Cheaper rolling stands often struggle to support heavier lights and modifiers, eventually bending or becoming unstable, which makes quick adjustments difficult. A sturdy stand ensures smooth movement, stability, and a much more efficient workflow during the shoot.
The Core Principle of Boudoir Lighting
The most important takeaway from the Light the Pose method is that lighting and posing should never be considered separate decisions during a boudoir session. They are part of the same visual system, working together to shape the final photograph.
Whenever a pose changes, the photographer should immediately consider how the light interacts with the new position of the body. If the light no longer reveals the curves correctly, the lighting position should be adjusted. If the light cannot move, the subject’s body should be repositioned so that the curves remain visible to the camera.
Once photographers begin thinking about lighting and posing as a single process rather than two independent techniques, their images instantly gain more depth, shape, and elegance. The body becomes sculpted by light instead of flattened by it, and the pose finally appears in the photograph the way it was intended.
That is the essence of Light the Pose.
WTACH THE COURSE HERE → Light the Pose Online Course